Making a camera is not easy. Our previous articles have focused on my subtopics surrounding a camera. In this article, we bring you another exciting take. We will show you how to make a mini camera. Moreover, we will show you how to efficiently hide one in plain sight.
Table of Contents
How to Make a Mini Camera- Step By Step Guide
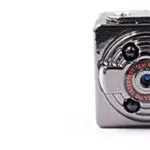
Recommended ready made mini camera if you do not want to make a mini camera at home:
Method: Using Old Camera
Step 1: Get A Camera
This depends on your definition of ‘mini’. You can choose the size you want. If you want an extremely small camera, you might have to hunt more. There are two options here. You can either buy a cheap mini camera or a webcam. Both of these work well. The only difference is quality. A webcam might not be high definition. A camera, on the other hand, will give you quality shots.
Needless to say, the price will differ accordingly. Since we are making a small camera, pick a size that is not too visible. Keep in mind that you want the mini camera to be hidden. Another factor is the purpose of the camera. If you need a camera for basic and straightforward supervision, you can buy a cheap one. The same rule applies if you are doing this project as an experiment.
However, if you are keen on using it, you will need a high quality mini camera. These come under the type of professional security footages. These cameras can be purchased in stores or online. Our suggestion will be to get it from a hardware store. Here, you can even get a demonstration to use the camera.
Step 2: Opening the Camera
This might seem absurd, but it is part of the process. You don’t want to use the readymade mini camera. This article is for those who want to build it from scratch. Of course, you cannot quickly make a mini camera by itself. Therefore we skipped that step. Opening the camera does not mean dissecting it. It merely means uncovering it.
In other words, you have to remove the top shell of the camera. This is to make the camera more compact. At every step, you need to remember that this is almost like a spy camera. Therefore, the smaller the camera, the better. Once you carefully remove the outer shell, you will get to see the parts of a tiny camera. If you are into microorganisms, this is a treat for you. You will see small wires and camera lenses.
Some cameras will have circuits right below the top covering. You have to be careful with this. If you damage the course, the camera may not work. If you don’t have the right temperament for this, you can ask the hardware store to uncover the camera. To be prepared for the worst case, you can buy two cameras.
Step 3: Figure Out An Optimal Hiding Spot
Read on carefully. This happens to be the most crucial step in the whole process. To make a mini camera, let’s assume we are hiding it somewhere. You can choose any spot that you want. Just keep in mind that it should be in stealth mode. This means that even upon searching, it should not be easily found. We have you covered. Therefore here are few tips to up your hiding game. Choose any one of the spots that you want:
Difficult to spot: This spot will be ideal for experimenting with. While choosing such a location, make sure that it is completely hidden. The mini camera needs to blend well with the surroundings. Eliminate all sources or hiding points that reveal the mini camera. If you were good at hide-n-seek as a kid, this should be easy for you. You can apply all your childhood skills for this one.
Use objects: This means that keep the camera undercover. You might have definitely heard of undercover cops and people. This point is just like that. This means that you will have to use things to mask the camera. However, remember to keep it natural. Wherever you hide the camera, it should not look too fake. For example, if you are hiding things in the garden, use thick plants to mask the mini camera. If you use objects that don’t belong, anyone will get suspicious. You can’t have a set of books in the garden where you hide the camera. Therefore, it is essential that the camera blends with the surroundings, here as well.
Make a camera spot: This one is the easiest. Our homes consist of many items that are square-shaped. Therefore this works best. You can simply use a shoebox or any cardboard box. This can even work in already existing boxes. Just make sure to position it in the right place. Cut a small hole in the box. This is where the mini camera will fit. The hole needs to perfectly accommodate the camera. If it is loose, the camera will fall off. Keeping it too tight will cause a blurry recording. Therefore it is advised to cut the right sized camera-hole into the cardboard box.
Step 4: Adjust The Camera Settings
This might seem complicated, but it’s an easy step. We want the camera to take videos, not pictures. Therefore for this, you will have to change the settings. If you use cameras often, you will know how to switch it to video mode. Sometimes, you have a separate control for it altogether. This is better since it is more comfortable.
One important adjustment is the quality. We all love and want high-quality pictures. The same goes for surveillance. We might need high-quality videos. But one important thing to remember is that mini cameras might not have a lot of storage space. This means that you have to space-optimize. One way to do this is to change the video recording setting. Keep the video quality on the lowest one possible.
If this is just for an experiment, the quality will not matter. If you plan on using the camera, then see what suits your eye. The problem is that you will have to keep changing the memory card of the camera. If you are okay with it, then keep the high-quality on.
Step 5: Location Setting
Yes, the previous step covered this. However, this time we will tell you how to adjust the zoom and camera angle. This is important. You might have the best hiding spot, but it needs to capture the necessary events. If your camera is undercover, make sure the lenses are not covered by anything. This will render the whole project pointless.
This was how to make ad position a mini camera. If you want to do the whole camera from scratch, we have another method for you. This one is for all DIY enthusiasts.
Method 2: Using Old Phone
Step 1: Get Old Phone
The first thing you will need is an old cell phone. Of course, it should be functional and needs to have minimal internet. The cell phone you use here cannot be used for other purposes after the project. Neither can you use it while it is recording.
Step 2: Install An App
There are many apps available for hidden cameras. Depending on the type of phone you use, the app and quality will differ. If you use an android, you can install the app “Salient Eye” or “Security Plus”. If you are using an iPhone, you can install a few apps for security footage. The “Alfred App” is one of the best apps that work on both devices. The only drawback is that you will have to pay for the apps on an iPhone. This is not uncommon news to iPhone users. Therefore, Alfred App is a right choice.
Step 3: Connect The Phone
Now you have to connect the phone to a PC or a laptop. Use a wireless network and make a connection. It does not matter whether you use a computer or a laptop. If you have a spare phone, there’s nothing like it. This is the best thing to use. Whatever device you use to protect, make sure that the app is secure. Other similar sites can easily get access to your device. Therefore put a safety lock on your screen.
Step 4: Get Access
Now you have to put your technical skills to use. If you do this often, you might have the necessary cables. You will need a video player with a streaming cable. This will help you watch the footages remotely, as long as you have internet access. The best things to use here are the Windows Media Player. This is a classic.
It is also easy to use. The second thing you can use is the VLC media player. This is another classic. If you opt for VLC, do the following. Click on the option saying “Open Network Streaming”. This will be in the Media option. The next step is to go to the page of the webcam that you have installed. Put the URL of the camera onto the VLC. Now you will automatically get the option of connecting
Step 5: Position The Camera
This happens to be the most crucial step of the whole process. Since we are making a camera, let’s assume we are hiding it somewhere. You can choose any spot that you want. Just keep in mind that it should be in stealth mode.
This means that even upon searching, it should not be easily found. We have you covered. You can go back to the first method and see the tips we have given. Just remember that it should be discreet.
Simpler Way to Make a Mini Camera
These were simple ways to make a mini camera. For your benefit, we have added a few household items that act as excellent hiding spots.
- Speaker or shoebox: The steps are easy. As motioned above, make a tiny hole in the box. This is where your mini camera will be. Fix the lens here and glue it. Use the right glue for the job. Connect this camera to your PC.
- The teddy bear: This is the oldest technique in the book. Spy films usually show hidden cameras in the eyes of teddy bears. Using such stuffed toys you can make a mini camera. Here, you cannot cut open the eye socket of the bear. You will need to open the shell of the mini camera. Now, cut open the back of the teddy bear. Replace the teddy bear’s eyes with the camera lenses. It will be best to use two lenses. The eyes need to look similar. Therefore, use two lenses. Once you position the lenses, stitch the bear back up. Keep the bear at a non-suspicious area of your house. You now have a bear as a spy!
- Sharpener: Yes, you read that right. This might sound absurd. But we don’t mean any regular pencil sharpener. We are talking about the electric pencil sharpener to make a mini camera. This is slightly difficult to install. You will have to unscrew it first. Since it is electrical, it will have wires and a circuit. We do not need these, so it is okay if they get damaged in the process. You have two options now. You can either replace any of the parts that you removed. The other way is similar to the shoe box. Make a hole and put your mini camera in it. Connect it to whichever device you are using. The only drawback is the positioning. It is suspicious to have an electric sharpener in your showcase. By following the steps above, you can easily connect any device to your mini camera. Now, you also know some of the best hiding spots in your house.
Things You Need
The things you need for this is not very elaborate. The most important thing is the camera. Here is a list of the things you will need:
- Camera or a web camera
- Glue
- Connecting device or PC
- A shoebox, teddy bear or electric sharpener
Final Thought
Making a mini camera by itself is a big task. You need to have the necessary skills and experience for the job. Therefore, in this article, we used readymade mini cameras and turned them into spy devices. As mentioned above, be mindful of the usage. Do not use the mini camera for illegal activities. You have to make sure that whatever you record is consensual. Secondly, read our article on laws for hidden mini cameras in case you have any doubts.



Leave a Reply